Kayla over at Freckles in April did a post about her wood bead necklace, and she posted this picture:

I decided that I would like to copy the shirt behind the necklace.
However, being somewhat skeptical about my abilities to do so, I failed to take a before picture. It was a basic long-sleeved men's shirt that I got from my local thrift store for $0.33. It looks a lot like this one.
First, I removed the collar and front pocket using a seam ripper, and then sewed up along where the collar was:

I also sewed in some darts in the front and the back to make it more fitted. I can't really tell you how to do it specifically, I just tried the shirt on inside out, and then pinched and pinned equal distances from the buttons in each side. The size of the shirt before will determine how much you have to bring it in. I did the front darts first, and the back darts later.
I next cut off the sleeves so that I could have the material needed for the ruffles. The one in the picture had long sleeves that were rolled up. I measured how long I wanted my ruffle to be (about 11.5 inches), and then added a couple inches to that measurement so that it would be ruffly. I ended up cutting off about 14.5 inches of sleeve.

The cut sleeve looked really lame all by itself, so I cut the cuff off of the bottom of the sleeve that I had removed. My bicep happens to be larger than my wrist, so I needed a bit of extra material to make the sleeve work completely, so I cut the collar that I had removed in half, and then pinned and sewed the pieces together so that they would fit around my bicep. Then I pinned the sleeve to it (sleeve right-side-out, cuff inside-out), and then sewed all around. The second time, I pinned things and sewed wrong, and was forced to use my seam ripper to fix it...so you shouldn't do that. This was the result:

When taking a picture of yourself from below, be sure to crane your neck upward to avoid showing off multiple chins.
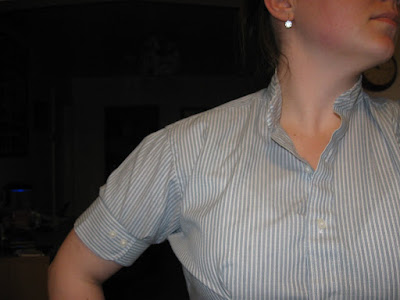
Then I took the sleeve parts and cut them in half. Then I used the longest stitch on my sewing machine, and gathered them until I liked it. Then I pinned and sewed them to the shirt.
 Then I took about 50 pictures of myself looking like a total dork. Here's one that didn't turn out blurry, even though I look grumpy:
Sometimes cropping helps?

Well, nope.
Maybe once Nate gets home I'll force him to take a few pictures of me that look less like I took them myself.

You're amazing!! I've been thinking about doing the same thing but hadn't found a shirt I wanted to use yet. Now I can turn to this lovely tutorial to do mine :)
ReplyDeleteKayla
Freckles in April
Oh my gosh! You are amazing! That shirt looks great!
ReplyDeleteSooo, found you because our blog is called "The Murrayed Life" and this shirt is GREAT! I would never think of doing that (I'm also so not a sewer) but love, love the idea and might give it a shot.
ReplyDeleteWow. That's all I can say. Wow. I've always known you were talented, but wow...
ReplyDeleteGreat work Nicole! I am almost tempted to try that myself..almost. I love your poses by the way. Very hot :)
ReplyDeleteThat is awesome! I would never think to do that, and I'm sure if I tried it wouldn't turn out. Way to remake that shirt!
ReplyDeleteWhat talent! You look amazing!I don't think I would've ever thought to do that with a shirt!
ReplyDelete